
This post describe the necessary steps to gain root in SkyTower: 1 available on Vulnhub (https://www.vulnhub.com/). This box, according to the autor Telspace (https://twitter.com/telspacesystems), was designed for the CTF at the ITWeb Security Summit and BSidesCPT (Cape Town).
Machine Name: SkyTower 1
Resource URL: https://www.vulnhub.com/entry/skytower-1,96/
Release Data: 26 Jun 2014

Summary
To obtain administrative access in this box, the follow kill chain have been executed.
- Recon identified ports 80/TCP, 3128/TCP open ‘s and 22/TCP Filtered.
- Recon identified that Apache/2.2.22 is running at port 80/TCP. A SQLi vulnerability was been found in this application and got exploited, revealing SSH credentials.
- The service Squid at port 3128/TCP which is configured as Open Proxy, was use to pivoting to internal interfaces in the target system, granting access to port 22/TCP inside the target system.
- Bypassing of shell restrictions and executing commands through ssh.
- Identification of MysqlServer in the target system, the service was been compromised with default credentials from root user, revealing new clear text credentials from others users in the database.
- Lateralization of privileges using credentials found in the database.
- Exploiting misconfiguration on the sudo file, allowing the bypassing of restrictions to sara user run commands, granting root access to attacker.
WriteUp
Recon
In the Recon step, nmap was used to enumerate ports and services on the target. The nmap identified 80/TCP,3128/TCP open and 22/TCP Filtered.

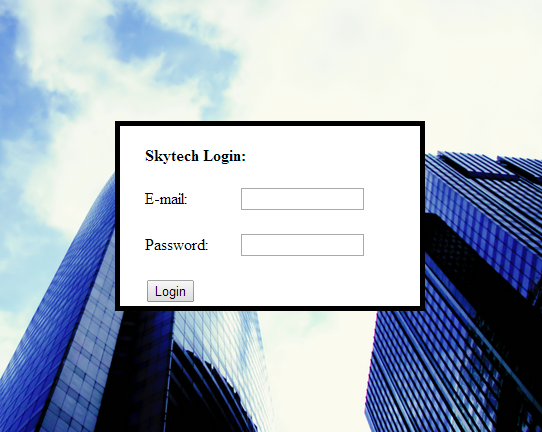
The port 80/TCP is running Apache/2.2.22, this service provide a web application called ‘SkyTech‘ which has a form in the index.html

Procedures detect, when some SQLI paylaods is inserted in the application, the stack trace is dumped, revealing mysql errors.

Exploitation
After tests with difererent payloads, the application has some mechanism to mitigate SQLi attempts removing characters. The SQLI payload was ajusted to this feature and a valid login is returned by the application. The payload needs to be inserted em both fields: E-mail and password.
# SQLi paylaod valid against the application.
' or '2' like '2;#
After a valid login against the application using SQLi techniques, the application reveals SSH credentials from user john.

A previosly nmap reports that the port 22/TCP is Filtered, probably the SSH service is under some restrictions by origin of connection. Another service identified previously is running at port 3128/TCP. The nmap reports that the Squid Proxy (3128/TCP) is configured as Open Proxy (https://www.rapid7.com/db/vulnerabilities/http-open-proxy), this configuration allow the attacker to reach the network from inside the target system, bypassin firewalls restrictions. A shellscript was used to enumerate the internal ports and services pivoting trhought the Open Proxy.
#Shellscript to enumerate internal services using HTTP Proxy.
for port in $(seq 1 1 1024); do nc -zv -X connect -x 192.168.1.137:3128 127.0.0.1 $port ;done
The ssh connection was established with the Pivoting. Some mechanisms in the target system do not allow the user to spawn a TTY shell, so the SSH was used to bypass such restrictions, executing commands when the user connect.

Privilege Escalation
The access in the target system is under the user John (uid 1000). The script LinEnum (https://github.com/rebootuser/LinEnum/blob/master/LinEnum.sh) was used to gathering information about the target system. This procedure reveals that the system has anthers users in the system.

In the enumeration to privilege escalation step, the Mysql service is identified running with the user root using default credentials.

Pivoting the traffic with SSH and OpenProxy, the attacker is allowed to reach the mysql server at local interface (127.0.0.1) at port 3306/TCP and access the database with root privileges.

One database in the mysql server is identified by ‘SkyTech‘, this database has clear text passwords for the users john, sara and willian.

The credentials for the username sara is valid and allow the attacker to login through ssh.

With the privileges from the username sara ( uid 1001 ), has been identified that the sara is able to execute sudo commands without provide password.

The attacker is able to bypass the sudo restrictions and obtain the content of /root/flag.txt.

Conclusion
This box is pretty crazy, I like very much jump across tunnelins and services, this box explore this massively. In the benning of privilege escalation steps, I got some problem with the SSH restrictions because of TTY shell when set the /bin/bash shell. Latter I remember that sh shell is less common to have restrictions in the system, so using the sh shell with the ssh -t flag to spawn a TTY shell, the problem is solved.
# SSH command enabling TTY shell.
ssh  -o "ProxyCommand=nc -X connect -x 192.168.1.137:3128 %h %p"  sara@192.168.1.137 -t  '/bin/sh'
I don’t know if the root user is ownable, I read some writeups to discover if is but until now, nothing. I mean, without kernel exploits etc.
Another thing, if you want to use proxychains to pivoting, is totally fine. You only need in this case, go to /etc/proxychains.conf and set the proxy.
## ProxyConfiguration in /etc/proxychains.conf file
http 192.168.1.137 3128
Resources
- SSH Tunneling: https://www.ssh.com/ssh/tunneling/example
- SSH Tunneling: https://www.howtogeek.com/168145/how-to-use-ssh-tunneling/
- ProxyChains: https://linuxhint.com/proxychains-tutorial/
- LinEnum : https://github.com/rebootuser/LinEnum/blob/master/LinEnum.sh
- OpenProxy Acunetix https://www.acunetix.com/vulnerabilities/web/open-proxy-server/
- OpenProxy Rapid7 https://www.rapid7.com/db/vulnerabilities/http-open-proxy
